Single Zone Split DNS – This terminology is not correlated to SharePoint, but still I want to post in my blog, since I had stretch lot of my time to configure forward lookup zones on my Windows Server 2008 R2.
You may think why I want to configure forward lookup zones, that is not my job and it is related to Windows administrator (not SharePoint admin)
Let me illuminate the contextual background first
Just recently I bought a new laptop with Core i5 2.66 Ghz processor, installed memory of 6GB RAM, system type is 64 bit, I got the laptop with pre-installed OS Windows 7 however my idea is to create a server farm on single machine, so initially I have installed a fresh copy of Windows Server 2008 R2 Enterprise (still Windows 7 is there and has choice of selecting the operating system before booting, we can call it as dual boot machine)
After installing Windows Server 2008 R2 ENT, I have configured DNS (Domain Name System) then given FIVENUMBER.COM as domain name, my full computer name is SHAREPOINT.FIVENUMBER.COM (SHAREPOINT is my computer name, computer name + domain name = full computer name), then in Active Directory I have created two service accounts for SharePoint basically FIVENUMBER\SPAdmin and FIVENUMBER\SPService
At that moment I have restarted the system and logged in with the newly created account FIVENUMBER\SPAdmin
Then, I have installed SQL Server 2008 R2 Enterprise Edition, followed by SharePoint 2010 pre-requisites, we will get pre-requisite installer file within the SharePoint 2010 software, then last but not least I have installed my favorite SharePoint 2010 Enterprise Edition
Throughout the installation period the whole thing went smooth without a single problem, and then after I was on the go to configuring services and created the first web application on the new laptop, creation of web application was very fast and site accessing too, as it is recommended 4GB of RAM for developer or evaluation use for SharePoint 2010 (Please have a look at hardware and software requirements for SharePoint 2010) but my laptop has 6GB of RAM then apparently it will be fast.
Now we will get into the real article.
After finalizing the installations and configurations on my new laptop, I assumed to access my blog site www.fivenumber.com, as soon as I type the URL in the browser a windows authentication prompt appeared, look as if prompt for SharePoint sites, observing the prompt I stood shocked and I provided the user and password and then it navigated to the SharePoint site which is running on 80 port number, I have tried couple of times to access my blog site but continuously it prompts the box and takes me to SharePoint site, the blog site was working without any problem if I access from another PC, but I cannot access the blog site from my new laptop, then I become conscious that my domain name is also same as my blog site name
At that point I started Binging and came to identify that this is called as Single Zone Split DSN and can be fixed by configuring forward lookup zone, that means I have to create a new zone under forward lookup zone in the DNS manager, then I have to create a new host (A record), then followed by creating an Alias (CNAME)
Now we will see step by step how to add a forward lookup zone in Windows Server 2008 R2
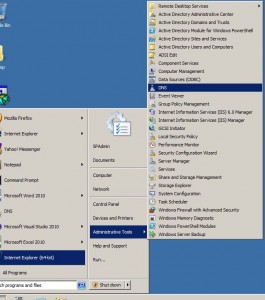
Go to Start > Administrative Tools > DNS (see Figure 1)
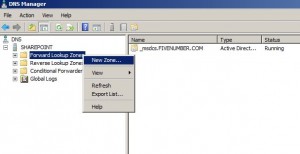
In DNS Manager, right click on Forward Lookup Zones and click on New Zone (see Figure 2)
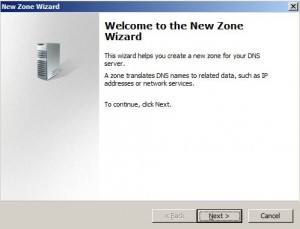
Then New Zone Wizard will start click Next (see Figure 3)
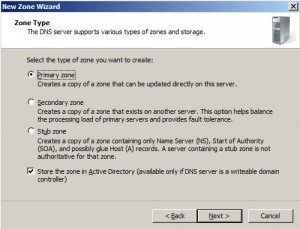
Under Zone Type ensure that Primary Zone is selected and Store the zone in Active Directory is checked, click Next (see Figure 4)
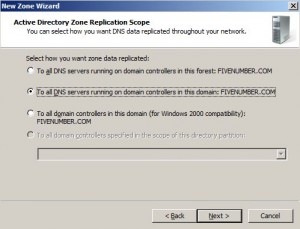
Under Active Directory Zone Replication Scope ensure that To all DNS servers running on domain controllers in this domain <domainname.com> is selected, click Next (see Figure 5)
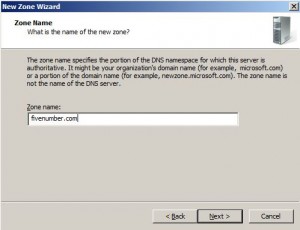
Under Zone Name, please provide the domain name (for example: fivenumber.com), click Next (see Figure 6)
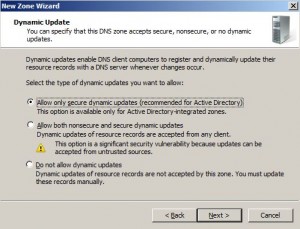
Under Dynamic Update ensure that Allow only secure dynamic updates is selected, click Next (see Figure 7)
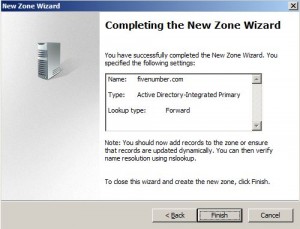
We reached the final step in the wizard and can view Completing the New Zone Wizard, click Finish (see Figure 8)
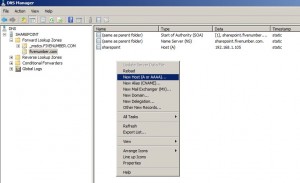
Now we have to create a new host under the new zone, to do that select the newly created created zone, in the DNS manager, then right click and click on New Host (A or AAA) to create the A record (see Figure 9)
For your information: A record is an entrance in the DNS zone, that maps each domain to an IP address.
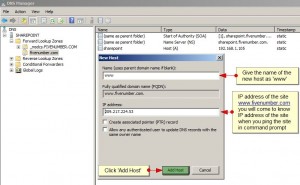
In the New Host dialog box provide the name as www and IP address in the appropriate boxes and click Add Host (see Figure 10)
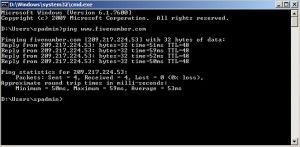
Note: You will come to know the IP address of the site when you ping the site in command prompt
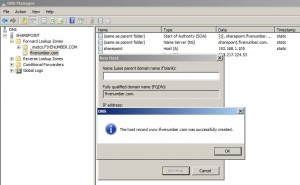
You can view the host record successfully created message (see Figure 11)
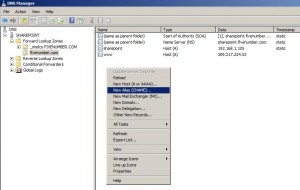
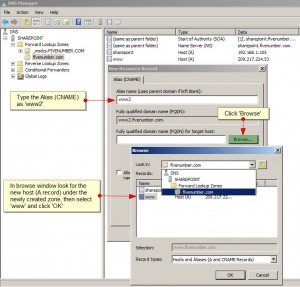
Now we have to create a new alias under the new zone, to do that select the newly created created zone, in the DNS manager, then right click and click on New Alias (CNAME) to create the alias name (see Figure 12)
For your information: Canonical Name in short called as CNAME that indicates the true host name of a computer that it’s aliases are linked with
In the New Resource Record dialog box provide Alias name as www2, then click on Browse and select the newly created host file www located under Forward Lookup Zones > <Newly created zone name> (see Figure 13)
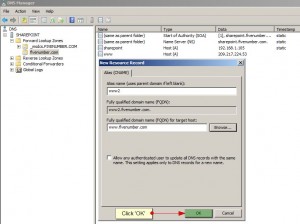
After selecting the fully qualified name, click OK (see Figure 14)
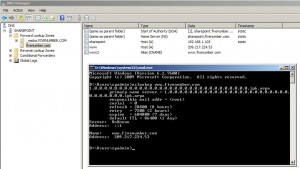
We are done almost, now try to execute the NSLOOKUP command to verify the IP address of the site and ping the site to view the reply ping back (see Figure 15 and 16)
