Steps to configure Form based authentication in MOSS 2007:
- Creating the SQL database
- Creating the users in SQL database
- Creating two sharepoint sites (one is web application and other extending the web application)
- Configure membership, role provider and connection string in both web.config files of the Sharepoint site
- Configure authentication type in central administration
We will discuss all the above point in detail
Creating the SQL database
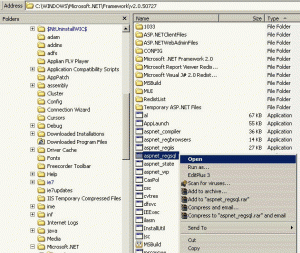
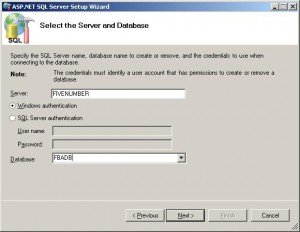
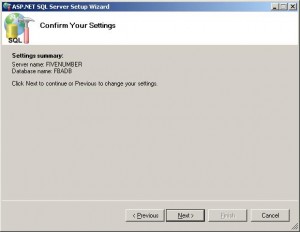
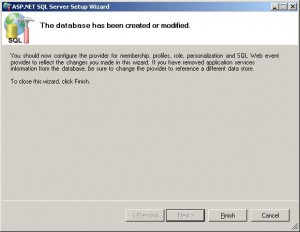
To create SQL database Microsoft has provided a utility called aspnet_regsql.exe, browse to the location C:WINDOWSMicrosoft.NETFrameworkv2.0.50727
Creating the users in SQL database
To create users in SQL database first of all create one ASP.NET web application using Visual Studio 2005, open Visual Studio 2005, then click on.
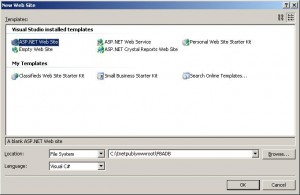
File > New > Website
Select the ASP.NET website and click OK
To add the web.config file, right click on the project name in solution explorer select add new item, select web configuration file and then Add
or
Press F5 to automatically adding the web.config file to the project
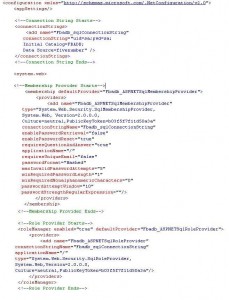
Add the connection string in the web.config file
<!–Connection String Starts–>
<connectionStrings>
<add name=”Fbadb_sqlConnectionString”
connectionString=”uid=sa;pwd=sa;
Initial Catalog=FBADB;
Data Source=fivenumber” />
</connectionStrings>
<!–Connection String Ends–>
<system.web>
<!–Membership Provider Starts–>
<membership defaultProvider=”Fbadb_ASPNETSqlMembershipProvider”>
<providers>
<add name=”Fbadb_ASPNETSqlMembershipProvider”
type=”System.Web.Security.SqlMembershipProvider,
System.Web, Version=2.0.0.0,
Culture=neutral,PublicKeyToken=b03f5f7f11d50a3a”
connectionStringName=”Fbadb_sqlConnectionString”
enablePasswordRetrieval=”false”
enablePasswordReset=”true”
requiresQuestionAndAnswer=”true”
applicationName=”/”
requiresUniqueEmail=”false”
passwordFormat=”Hashed”
maxInvalidPasswordAttempts=”5″
minRequiredPasswordLength=”1″
minRequiredNonalphanumericCharacters=”0″
passwordAttemptWindow=”10″
passwordStrengthRegularExpression=””/>
</providers>
</membership>
<!–Membership Provider Ends–>
<!–Role Provider Starts–>
<roleManager enabled=”true” defaultProvider=”Fbadb_ASPNETSqlRoleProvider”>
<providers>
<add name=”Fbadb_ASPNETSqlRoleProvider”
connectionStringName=”Fbadb_sqlConnectionString”
applicationName=”/”
type=”System.Web.Security.SqlRoleProvider,
System.Web,Version=2.0.0.0,
Culture=neutral,PublicKeyToken=b03f5f7f11d50a3a”/>
</providers>
</roleManager>
<!–Role Provider Ends–>
As show in the below image
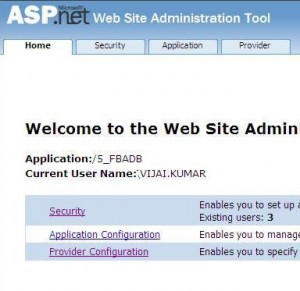
Save the web.config file and run ASP.NET configuration wizard by clicking on Website menu and click ASP.NET Configuration
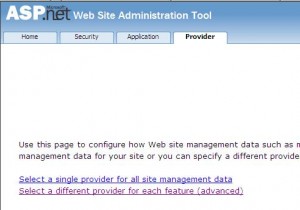
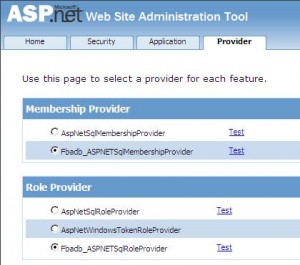
To test the Membership and Role provider click provider tab and then click on Select a different provider for each feature (advanced)
Select your Membership provider name and click on Test link
If you can see the message like ‘Successfully established a connection to the database’ think that the communication between the interface and database is successfull
Now go on to create the user
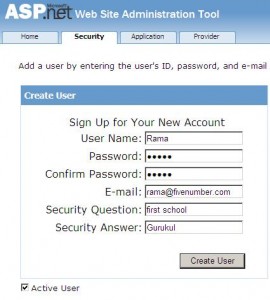
Click on the Security tab of ASP.NET web site administration tool, under Users section click the link Select authentication type and select the radio button From the internet click Done
Then, again click on Security tab click on Create user fill the appropriate fields
Creating two sharepoint sites (one is web application and other extending the web application)
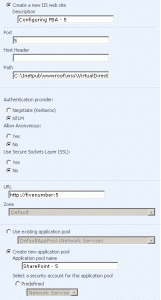
Go to Central Administration > Application Management > Create or Extend Web Application > Create New Web Application
Fill the appropriate fields
Create a site collection by choosing a template (team site, collaboration portal etc)
After creating the Top Level Site Successfully
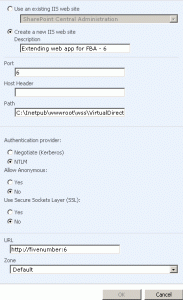
Now, Extend the web application
Go to Central Administration > Application Management > Create or Extend Web Application > Extend Web Application to Another IIS Web Site
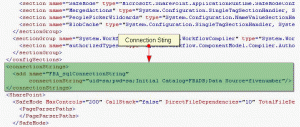
After Extending the web application, now we should configure connection string in web.config file’s of sharepoint site (web application and extended application) by adding the connecton string tag exactly below the </configSections> tag and above the <sharepoint> tag (Note: Change the Data Source name according to your database servername)
<connectionStrings>
<add name=”FBA_sqlConnectionString” connectionString=”uid=sa;pwd=sa;Initial Catalog=FBADB;Data Source=fivenumber” />
</connectionStrings>
See the image below:
Confiure Membership and Role provider in both the sharepoint sites (web application and extended application)
Search for the machinekey tag (<machineKey validationKey=”79DDCD075B91C0B088FA25244D65D0745641F91E8A823392″
decryptionKey=”C855BB4C77B455A6706638B8A9D1439B5BB0F3612F2F9DCA” validation=”SHA1″ />)
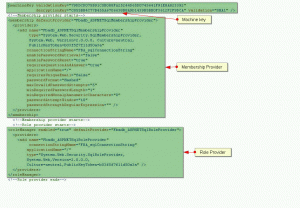
Copy and paste the below tags exactly after the machinekey tag
<!–Membership provider starts–>
<membership defaultProvider=”Fbadb_ASPNETSqlMembershipProvider”>
<providers>
<add name=”Fbadb_ASPNETSqlMembershipProvider”
type=”System.Web.Security.SqlMembershipProvider,
System.Web, Version=2.0.0.0, Culture=neutral,
PublicKeyToken=b03f5f7f11d50a3a”
connectionStringName=”FBA_sqlConnectionString”
enablePasswordRetrieval=”false”
enablePasswordReset=”true”
requiresQuestionAndAnswer=”true”
applicationName=”/”
requiresUniqueEmail=”false”
passwordFormat=”Hashed”
maxInvalidPasswordAttempts=”5″
minRequiredPasswordLength=”1″
minRequiredNonalphanumericCharacters=”0″
passwordAttemptWindow=”10″
passwordStrengthRegularExpression=”” />
</providers>
</membership>
<!–Membership provider starts–>
<!–Role provider starts–>
<roleManager enabled=”true” defaultProvider=”Fbadb_ASPNETSqlRoleProvider”>
<providers>
<add name=”Fbadb_ASPNETSqlRoleProvider”
connectionStringName=”FBA_sqlConnectionString”
applicationName=”/”
type=”System.Web.Security.SqlRoleProvider,
System.Web,Version=2.0.0.0,
Culture=neutral,PublicKeyToken=b03f5f7f11d50a3a” />
</providers>
</roleManager>
<!–Role provider ends–>
See the below image:
Configure the authentication type in central administration
Go to Central Administration > Application Management > Authentication Providers
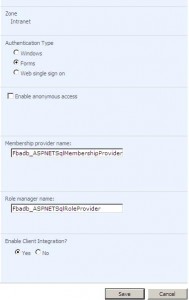
Click on the extended web application (2nd in the row) enter the Membership provider name and Role provider name as shown in the below image:
Now, add the user in the web application (which you have created in SQL database) in Site Settings > Permissions > Add Users
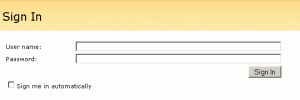
Try to access the extended form based authentic web application

Thanks you so much but i have a question when i login using form authentication sharepoint display error : Access Denied . i want fix it , help me !
Dzung, have you added the user in sharepoint web application (Site Settings > Permissions > Add Users) which you have created in SQL database?
Thanks for looking into that.
Hi GVK , Thanks for you’r Hellp i’m do it succsessful. I can add user to this site but when i change config authenticate type to forms. I can’t login this site with signed user. please helpme!
Mysite wsstemplate.com
user demo1 pass demo1
Dzung, you should change the site collection administrator to the user you added using the ASP .net Web Site Admin Tool and use this user to login to your FBA site.
Hi all ,
I think your entry have some problem :
1. if you don’t add , ,, to center Admin web.connfig
2. default provider in membership Roles change to AspNetWindowsTokenRoleProvider
when add to center admin web.config . We go to center admin add user to premium Administrator or second administrator . after login to your site with my account .
Nice article
I have been trying to connect to a existing Membership database which was used for another asp.net application
problem is my asp.net have ApplicationName=”App1″ and
in such a situation, how can i use the same database for Share Point?
No, problem you can use the already running application database to configure FBA in Sharepoint
G Vijai Kumar ,
I have configured FBA as your article.But i get error ACCESS DENIED when i login with a user i created in the ASP.NET Web Admin. Can you explain more on this.As whats on the comment too isn’t clear.
Where to add users etc..
Thanks
Patrick, you have to add the user (the name which you created in ASP.NET web admin) in extended web application, have you done with that step? please confirm
Thanks for the reply Kumar.
I don’t have an extended Web Application do i need to create one?
Do i need to add connectionstrings,memebership and role provider to my Central admin web.config.?
When i go and try to add the user i created in ASp.NET we admin it can’t find it
Thanks
I added the connectionstrings,Role Provider and MemebershipProvide to my Sharepoint Central Admin web.config but as soon as i do that i can’t login in to some pages in Sharepoint Central Admin anymore i get ACCESS DENIED from the browser. My site looks like this http://myserver:28840/sites/Extranet this extranet wasn’t created using the extended options i only created a nor mal collaboration site and the changed it for forms Auth.
Any ideas why i’ m getting this error.
Thanks
Good article but, its not providing complete information how to create users for different site collections.
Please provide this information that helps a lot.
Thanks , it is nice article but have the following limitation in MOSS 2007.
The WebService UI for third party products, i.e. client applications such as MS Word, still insists on using Windows Auth for it’s “Client Integration”. As far as I can tell, Office 12 doesn’t provide an override for that. Rightfully so, Client Integration should be disabled for Forms Auth. Now, you *could* throw in custom credentials using WCF or WSE 3.0, but MS Word won’t understand them. You could however integrate your own custom applications into sharepoint using those.